I was standing in my kitchen last Tuesday, staring at a pile of expensive, “artisan” bar soaps I’d bought online, realizing they were basically just overpriced scented wax that left my skin feeling like sandpaper. It hit me then: why am I paying a premium for marketing fluff when I can just build a better system at home? Most people think learning how to make soap requires a chemistry degree or a studio filled with expensive silicone molds, but that’s just more gatekeeping we don’t need. Honestly, if you can follow a basic recipe and manage a little bit of heat, you can create something way more effective than the junk sitting on your drugstore shelf right now.
I’m not here to show you those hyper-curated, “aesthetic” soap-making videos where everything looks like a Pinterest dream. We’re skipping the fluff and focusing on the actual mechanics of a functional batch. I’m going to walk you through the essential gear, the safety protocols you actually need to follow, and a straightforward method that prioritizes results over vibes. By the time we’re done, you’ll have a reliable process to make soap that works for your skin and your budget, without the unnecessary headache.
Guide Overview
Tools & Supplies
- Digital scale for precise measurements
- Immersion blender for emulsification
- Heat-resistant glass pitchers for melting
- Silicone molds for easy removal
- Base oils (Olive, Coconut, Palm) 2-3 lbs
- Sodium Hydroxide (Lye) 5-10 oz
- Distilled water 10-15 oz
- Essential oils or fragrance 1-2 oz
Step-by-Step Instructions
- 1. First things first, we need to get your workspace set up so you aren’t scrambling halfway through. Clear off a sturdy table, grab a digital scale (precision is everything here), and make sure you have your safety gear ready. I’m talking safety goggles and gloves—no exceptions. Lye is no joke, and I’d rather you be a little over-prepared than end up with a chemical burn because you wanted to skip the “boring” part.
- 2. Next, let’s handle the lye solution. Weigh out your distilled water in one container and your lye in another using your scale. Slowly pour the lye into the water—never the other way around, or you’ll get a nasty volcano effect. It’s going to get hot and release some fumes, so do this in a well-ventilated area or right by a window. Once it’s mixed, set it aside to cool down to a temperature that won’t shock your oils.
- 3. Now, it’s time to prep your oils. Weigh out your fats (like coconut oil for lather or olive oil for moisture) and melt them down in a heat-safe pot. Once they’re liquid, combine them with your cooled lye water. This is where the magic happens. Grab your immersion blender—it’s the ultimate productivity hack for soap making—and start pulsing it into the mixture.
- 4. Keep blending until you hit “trace.” You’ll know you’re there when the mixture reaches a consistency similar to pudding and leaves a visible trail when you lift the blender. If you stop too early, your soap might be a greasy mess; if you go too far, it’ll harden before you can even get it into the mold. Just keep an eye on it and stay steady.
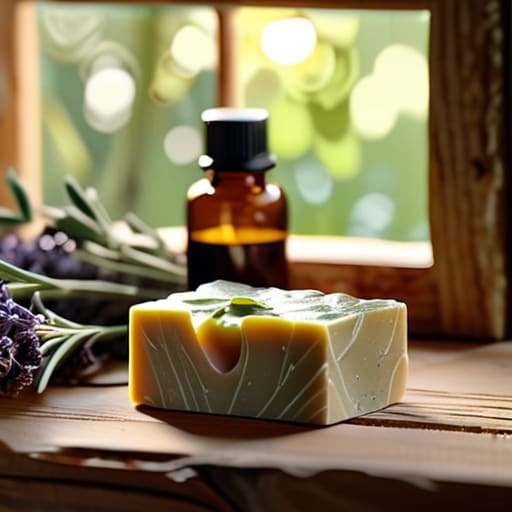
- 5. If you’re feeling fancy, this is the moment to stir in your essential oils or any natural colorants. I usually go for something simple like lavender or cedarwood, but don’t feel like you need a massive library of scents to make this work. Once everything is incorporated, pour the mixture into your mold. Don’t worry about making it look like a professional studio shot; just get it in there and smooth the top with a spatula.
- 6. Let the soap sit undisturbed for about 24 to 48 hours. This is the hardest part for me because I love seeing progress, but the soap needs this time to undergo saponification. Once it feels firm to the touch, pop it out of the mold and slice it into bars using a sharp knife.
- 7. Finally, the waiting game. You can’t use the soap immediately, or you’ll regret it. Place your bars in a cool, dry spot and let them cure for four to six weeks. This allows the water to evaporate, making your bars harder, longer-lasting, and much gentler on your skin. It’s a slow process, but trust me, the payoff is worth it.
Mastering the Cold Process Soap Making Method Without the Stress
Look, I get it. The first time you see a pile of lye and a bunch of oils, it feels a little intimidating. But the cold process soap making method isn’t some dark art; it’s just chemistry you can control. The biggest mistake I see people make is trying to rush the science. You can’t just eyeball your measurements and hope for the best. You need to be precise with your lye and oils ratio because that’s the difference between a luxurious bar of soap and a greasy mess that ruins your skin. Treat it like debugging a piece of code: if the inputs are wrong, the output is going to crash.
Safety isn’t about being paranoid; it’s about being prepared so you can actually enjoy the process. Before you even touch a single ingredient, make sure your soap making safety equipment—like goggles and gloves—is sitting right there on the counter. Once you’ve got the safety part handled, you can focus on the fun stuff, like experimenting with different essential oils for soap to get that perfect scent profile. Don’t worry about making it look like a Pinterest board on your first try. Just focus on getting the emulsion right and letting the physics do the heavy lifting.
The Essential Lye and Oils Ratio for Reliable Batches
Look, I get it. Seeing a massive spreadsheet of numbers and chemical formulas can feel like you’re trying to debug a legacy codebase with zero documentation. But here’s the reality: the lye and oils ratio is the literal operating system of your soap. If your math is off, your “system” crashes—meaning you end up with a bar that’s either a caustic mess or a greasy puddle that won’t even lather. I always tell people to stop eyeballing it. Even if you’re using high-quality natural soap ingredients, a slight miscalculation in your lye concentration can ruin the entire batch.
To keep things from getting chaotic, I highly recommend using a dedicated soap calculator online before you even touch a beaker. Don’t just guess based on a random recipe you found on a Pinterest board; those aren’t built for the specific oils you have sitting in your pantry. Once you’ve dialed in your math, double-check everything with a digital scale. We’re talking precision to the gram, not “a splash of this” or “a heavy pour of that.”
Also, a quick pro-tip for my fellow minimalists: if you’re feeling overwhelmed by the chemistry, you can always pivot to melt and pour soap techniques while you’re still learning the ropes. But if you’re committed to the real deal, just treat your measurements like code—test, verify, and never skip the documentation.
Pro-Tips for Not Ruining Your First Batch
- Safety isn’t a suggestion, it’s the whole point. Wear your goggles and gloves, and always pour the lye into the water—never the other way around—unless you want a literal chemical volcano in your kitchen.
- Stop obsessing over the “perfect” swirl. If your colors look like a muddy mess on the first try, just embrace it. It’ll still clean your hands, and honestly, the “aesthetic” look is overrated anyway.
- Get a digital scale and use it for everything. Measuring by volume (cups/spoons) is a one-way ticket to a batch that’s either too soft or too caustic. In soap making, math is your best friend.
- Don’t skip the curing phase. I know, waiting four to six weeks feels like an eternity when you’re excited, but if you use it too early, it’ll be a mushy, weak mess that disappears in two washes.
- Keep a “fail log” in a notebook. If a batch comes out weird, write down exactly what you did differently. Treating your soap making like a system rather than a magic trick is how you actually get better.
Don't Let the Mess Stop You
Look, I know it feels like a lot when you’re staring at a pile of oils, a container of lye, and a kitchen that suddenly feels way too small for your ambitions. But once you’ve nailed that lye-to-oil ratio and mastered the patience required for the cold process, you’ve basically cracked the code. It’s not about having a pristine, Pinterest-ready laboratory; it’s about understanding that consistency beats perfection every single time. Whether you’re tweaking your scent profiles or experimenting with different fats, just remember that the most important part of the system is the reliability of your measurements. If your math is solid, the chemistry will take care of itself.
At the end of the day, making your own soap isn’t just another chore on your to-do list—it’s a way to take back a little bit of control over the stuff you actually use every single day. There is something incredibly grounding about stripping away the commercial junk and replacing it with something you built from scratch with your own two hands. Stop waiting for the “perfect” moment or the “perfect” set of equipment to start. Grab your gear, trust your process, and just start making things that work. You’ve totally got this.
Frequently Asked Questions
Is it actually safe to handle lye in a small apartment, or do I need a professional-grade lab setup?
Look, I grew up in a cramped apartment, so I get the anxiety. You definitely don’t need a sterile lab or a dedicated workshop. As long as you have decent ventilation—like a window and a fan—and a clear workspace you can wipe down easily, you’re good. Just treat lye with respect: wear your goggles, use gloves, and don’t multitask. It’s about smart systems and safety gear, not expensive real estate.
Can I swap out some of these oils for whatever is already in my pantry, or will that totally wreck the batch?
Look, I get the temptation to just raid the pantry, but please don’t do it blindly. Soap chemistry is basically just a high-stakes math problem. If you swap your coconut oil for something like sunflower or olive oil without recalculating your lye amounts, you’ll end up with a greasy, soft mess that never quite hardens. If you want to experiment, just run your new oil combo through a lye calculator first. Don’t wing it.
How long do I really have to wait before I can actually use the soap without it being a total mess?
Look, I know the temptation to slice into a fresh loaf is real, but patience is your best tool here. You can usually handle the soap after 24–48 hours, but don’t even think about using it yet. It needs at least 4 to 6 weeks to cure. If you rush it, you’ll end up with a mushy mess that disappears in two showers. Let it sit, let it dry, and trust the process.
My soap looks super uneven and weirdly textured—did I mess up the temperature or is this just normal?
Honestly, take a breath—you probably didn’t ruin it. If you’re seeing weird lumps or a “sandpaper” texture, you’re likely dealing with soda ash or temperature fluctuations. If your oils and lye hit each other at wildly different temps, they can seize up or create “false trace,” making the texture look chaotic. It’s usually just a chemistry hiccup, not a total fail. Grab your multi-tool, check your thermometer next time, and let’s troubleshoot the batch.