I was sitting on my living room floor last Tuesday, shivering in a hoodie despite my heater being cranked to seventy, when I realized my apartment was basically a glorified wind tunnel. It’s one of those things we all ignore until it becomes a problem: you feel that tiny, annoying jet of cold air hitting your ankles, and you just accept it as part of the season. But honestly? You shouldn’t have to pay a premium to heat the sidewalk outside your entrance. Most people think weatherstripping a door is some high-level construction project that requires a contractor and a massive budget, but that is a total lie. It’s actually one of the easiest, most high-impact DIY wins you can tackle with just a few basic tools and about twenty minutes of your time.
In this guide, I’m skipping the fluff and the overly technical jargon to show you how to actually get this done. I’ll walk you through identifying exactly where your seals are failing and which materials actually last versus the cheap foam stuff that disintegrates in a month. We’re going to focus on functional, long-term fixes that stop the drafts and save your energy bill without turning your home into a construction zone. Let’s get to work.
Guide Overview
Tools & Supplies
- Measuring tape to determine door dimensions
- Utility knife to trim excess material
- Screwdriver to secure door sweeps or hardware
- Vacuum or broom to clean the door frame
- Weatherstripping roll (foam, rubber, or V-strip)
- Door sweep (if installing at the bottom)
- Adhesive or mounting screws (if not included with strip)
Step-by-Step Instructions
- 1. First things first, you need to figure out what you’re actually dealing with. Grab a flashlight and a piece of paper, then do the light test. Close the door and shine the light around the edges; if you see light peeking through, that’s exactly where your heat is escaping. I also recommend doing a “draft test” by running a lit incense stick or even just a thin strip of tissue along the door frame. If it flickers, you’ve found your problem areas.
- 2. Before you even think about sticking anything new on, you have to clean the surface. I know, it sounds tedious, but if you try to apply weatherstripping over years of dust and grime, it’s going to peel off in a week and you’ll be right back where you started. Grab some isopropyl alcohol and a microfiber cloth to wipe down the door frame and the door itself. Let it dry completely—don’t rush this part, or the adhesive won’t actually bond.
- 3. Now, let’s talk hardware. You’ve got a few options: foam tape (cheap and easy), V-strip (great for side gaps), or the heavy-duty rubber gaskets. If your door has a massive gap at the bottom, skip the flimsy tape and go for a door sweep. I personally prefer the silicone-based strips because they don’t crack when the temperature swings wildly, which happens way too often in my neck of the woods.
- 4. Once you’ve picked your material, it’s time to measure. Don’t just eyeball it; that’s how you end up with awkward, jagged gaps. Use a tape measure to get the exact length of your door frame and the door itself. If you’re using adhesive foam, I suggest cutting it slightly longer than you think you need—you can always trim the excess with a sharp utility knife, but you can’t magically add more if you underestimate the length.
- 5. Time for the actual application. Peel the backing off your weatherstripping slowly, starting from the top and working your way down. The trick here is to apply consistent pressure as you go. If you just slap it on, you’ll get air bubbles that eventually turn into peeling sections. Think of it like applying a screen protector on a phone; stay steady, keep it straight, and don’t panic if it’s a little off—just peel it back and try again.
- 6. If you’re installing a door sweep on the bottom, make sure you’re aligning it perfectly with the threshold. Most sweeps require a few screws, so grab your drill and make sure you’re pre-drilling pilot holes. If you just drive a screw straight into the wood without a pilot hole, you risk splitting the door, and nobody has time for a repair job that’s more complicated than the one they started.
- 7. Finally, do a final “stress test.” Close the door and feel for any resistance. It should feel a little tighter than usual—that’s the point—but it shouldn’t be so difficult that you’re wrestling with the door every time you want to leave the room. If it’s sticking, you might have applied too much bulk, so you may need to trim a bit of the material down. Once it’s smooth, give it a firm press along the entire length to set the adhesive one last time.
Choosing the Right Types of Door Weatherstripping for Real Results
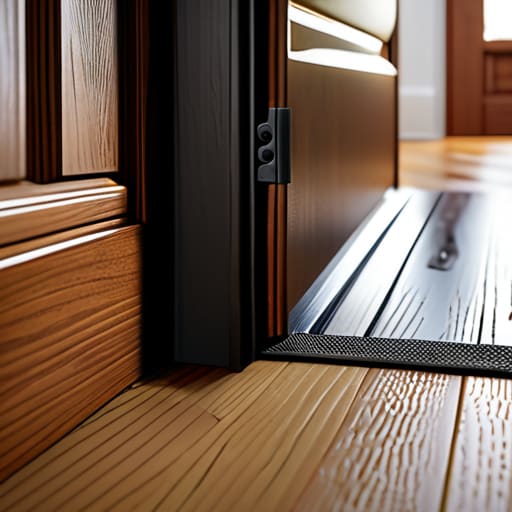
Look, you can’t just walk into a hardware store and grab the first roll of foam you see and hope for the best. If you pick the wrong material, you’re basically just decorating your door instead of actually fixing it. When you’re looking at the different types of door weatherstripping, think about where the gap is. If it’s a tiny, annoying crack along the side of the frame, a simple adhesive foam or V-strip works wonders. But if you’re dealing with a massive gap at the base of the door, you need to get serious about a door bottom seal installation to actually stop the draft.
For the heavy hitters—like the bottom of the door where most of the heat escapes—I usually lean toward silicone or heavy-duty rubber. They hold up way better against foot traffic and don’t compress into nothingness after a month. One of my favorite energy efficient home improvements is actually upgrading to a door sweep; it’s a low-effort move that makes a massive difference in how your room feels. Just remember: measure twice, buy once. There is nothing more frustrating than getting home with a seal that’s too thin to bridge the gap or too thick to let the door actually latch.
A Simple Door Sweep Installation Guide to Stop the Drafts
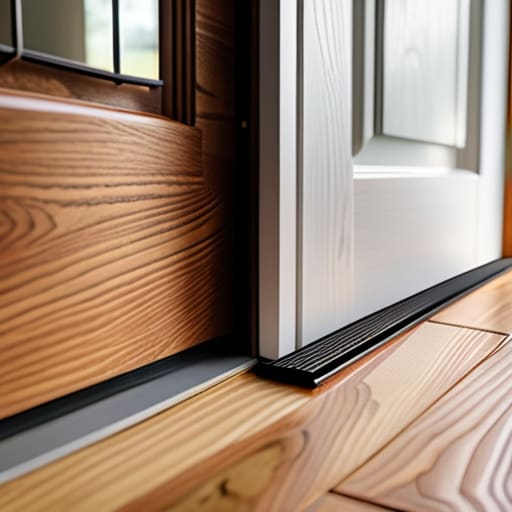
If you’ve already tackled the sides and top of the frame but still feel a rogue breeze hitting your ankles, it’s time to talk about the bottom. This is usually where the most egregious air leaks happen, and honestly, it’s the easiest fix on my list. A door sweep is basically a protective barrier that bridges that annoying gap between your door and the threshold. When it comes to door bottom seal installation, don’t overthink it. Whether you’re going with a screw-on metal strip or a simple adhesive silicone version, the goal is a snug fit that doesn’t make the door a nightmare to swing open.
Before you start drilling or peeling, do a quick “light test.” Turn off the lights in your hallway and see if you can see daylight peeking through the bottom of the door; if you can see it, the air can definitely get in. Once you’ve picked your sweep, make sure to clean the surface thoroughly with rubbing alcohol first—especially if you’re using an adhesive model—otherwise, that thing will peel off in a week. Adding a sweep is one of those small, low-effort energy efficient home improvements that actually pays off in your comfort levels (and your utility bill) almost immediately.
Pro-Tips to Make Sure Your Effort Actually Sticks
- Don’t skip the cleaning phase. If you try to slap new adhesive weatherstripping onto a layer of old dust and grime, it’s going to peel off within a week. Wipe the frame down with some isopropyl alcohol first so the bond is actually solid.
- Do the “Light Test” to find the culprits. Turn off the lights inside your place at night and have someone stand outside with a flashlight. Wherever you see light bleeding through the cracks, that’s exactly where your heat is escaping.
- Test the seal without breaking anything. Once you’ve installed your new strips, close the door and try to slide a piece of paper between the door and the frame. If it slides out easily, your seal is too loose; if you can’t move it at all, you might be making the door too hard to latch.
- Mind the gap, but don’t overstuff it. It’s tempting to keep adding more foam until it feels “tight,” but if you compress the weatherstripping too much, it loses its ability to spring back, and you’ll end up slamming your door against it every single time.
- Check your hardware while you’re at it. Sometimes a draft isn’t a weatherstripping issue—it’s a loose strike plate or a sagging hinge. If the door isn’t hitting the frame squarely, no amount of foam is going to fix that gap.
Stop Fighting the Drafts and Start Living
At the end of the day, weatherstripping isn’t some high-level engineering project; it’s just about closing the gaps that are making your life harder than it needs to be. Whether you ended up slapping on some foam tape for those side gaps or finally installing a solid door sweep to kill that bottom draft, you’ve officially taken control of your environment. You’ve picked the right materials, you’ve done the prep work, and now your home is actually going to hold onto the temperature you’re paying for. It’s a small win, but honestly, small functional wins are what keep a household running smoothly without constant headaches.
Don’t let the “perfect” home DIY influencers intimidate you into thinking you need a professional contractor for every little thing. Most of the time, the solution is just a few bucks and a little bit of grit to get it done yourself. Once you realize that you can actually maintain and optimize your own space, the world feels a lot less overwhelming. So, grab your multi-tool, finish that last strip of adhesive, and go enjoy a room that actually feels cozy and controlled. You’ve got this.
Frequently Asked Questions
I already have old, crusty foam strips on my door—do I really need to scrape them all off first?
Look, I get it—scraping old, crusty foam feels like a chore you’d rather skip. But honestly? If you just slap new strips over the old ones, you’re asking for a disaster. That old residue is basically a sabotage kit for your new seal. Take the extra ten minutes to scrape it down and hit it with some isopropyl alcohol. Trust me, your future self (and your heating bill) will thank you for doing it right.
How do I know if the gap is actually at the bottom or if it's coming through the sides of the frame?
The easiest way to find the culprit? Grab a flashlight and a piece of incense (or even a candle flame if you’re feeling old-school). On a windy day, hold it near the edges of the door. If the smoke dances or the flame flickers wildly near the sides, you’ve got a frame issue. If it only reacts at the floor, it’s time for that door sweep. Simple, visual, and zero guesswork required.
Will using adhesive weatherstripping ruin the paint on my door if I ever decide to move or change it?
Honestly? It’s a gamble. If you’re renting or planning to move, that high-strength adhesive can be a total nightmare. If you peel it off too fast, it’ll likely take a layer of paint with it. If you’re using cheap foam, it might be okay, but for the heavy-duty stuff, I’d suggest using screws instead. It’s a bit more work upfront, but it saves you from the “oops, I ruined the door” headache later.
Is there a way to tell if my door is actually warped, or is it just a bad seal?
The “paper test” is your best friend here. Close the door on a sheet of paper; if you can slide it out easily without any resistance, you’ve got a gap. But if the paper gets stuck in one spot and slides freely in another, your door is definitely warped. If the gap is consistent all the way around, it’s just a bad seal. Don’t replace the whole door yet—check the hinges first!