I was staring at a pile of particle board and a set of instructions that looked more like a cryptic coding error than a manual, wondering why I couldn’t just buy something pre-made. But here’s the truth: most of those “easy-to-assemble” flat-pack units are just glorified cardboard boxes that’ll wobble the second you add a heavy hardcover. If you’re actually trying to learn how to build a bookshelf that doesn’t feel like a cheap hack, you need to stop obsessing over the perfect wood stain and start focusing on structural integrity. I learned the hard way that a little extra time spent on a solid frame is worth way more than a Pinterest-worthy finish that collapses under the weight of your tech manuals.
In this guide, I’m stripping away the intimidating jargon and the “aesthetic” fluff to give you a blueprint that actually works. We aren’t aiming for museum-quality carpentry here; we’re building something functional, sturdy, and real. I’ll walk you through selecting the right materials, the essential tools you actually need (no, you don’t need a whole workshop), and the simple assembly steps to get it done. Let’s get to work and build something that actually stays upright.
Guide Overview
Tools & Supplies
- Circular saw or Hand saw to cut wood to size
- Power drill to fasten screws and pilot holes
- Measuring tape for precise layout
- Sandpaper to smooth rough edges
- 1×4 or 1×6 lumber (approx. 4-5 boards)
- Wood screws (1 box of 1.25 inch)
- Wood glue (1 bottle)
- Sandpaper (various grits)
Step-by-Step Instructions
- 1. First things first, stop scrolling through expensive furniture sites and go get some actual wood. I usually go for pine because it’s forgiving and doesn’t break the bank, but if you want something that feels a bit more “grown-up,” grab some birch plywood. Grab a tape measure, a pencil, and a saw—if you don’t own a saw yet, don’t panic, most hardware stores will actually cut the wood for you if you bring in your measurements.
- 2. Once you’re back at your workspace, it’s time to map everything out. Lay your boards flat on the floor and mark exactly where your shelves are going to sit. I always recommend using a speed square to make sure your lines are perfectly straight; if your lines are crooked now, your whole bookshelf is going to look like it’s leaning to one side by the time you’re done.
- 3. Now we get into the messy part: the assembly. If you’re using screws, please, for the love of all things holy, drill pilot holes first. If you just drive a screw straight into the wood without a pilot hole, you’re going to split the board, and then you’re just looking at a very expensive pile of kindling instead of a library.
- 4. To keep everything sturdy, I’m a huge fan of using wood glue in tandem with your screws. It might feel like an extra step, but once that glue dries, the joint becomes way more stable than just relying on hardware alone. Just keep a damp rag nearby to wipe away the excess glue before it hardens, or you’ll be fighting it later.
- 5. Once the frame is together and feels solid, it’s time to add those adjustable shelf supports if you want some versatility. I like to use small metal pins that sit in pre-drilled holes, which means you can move your shelves up or down depending on whether you’re storing tiny paperbacks or massive art books.
- 6. Don’t skip the sanding phase, even if you’re feeling impatient. Start with a coarser sandpaper to get rid of the rough edges and work your way up to a fine grit until the wood feels smooth to the touch. If you want to skip the heavy staining and go for a more minimalist look, just a simple clear matte sealant will do the trick to protect the wood without making it look like a piece of antique furniture from a thrift store.
- 7. Finally, and this is the part people usually ignore until it’s too late: anchor it to the wall. Whether you have kids, pets, or just a habit of bumping into things, a bookshelf is a heavy object that needs to be secured. Grab a simple L-bracket and screw it into a stud, and you can finally stop worrying about it tipping over and actually enjoy your new space.
Mastering Measuring and Cutting Wood Without the Stress
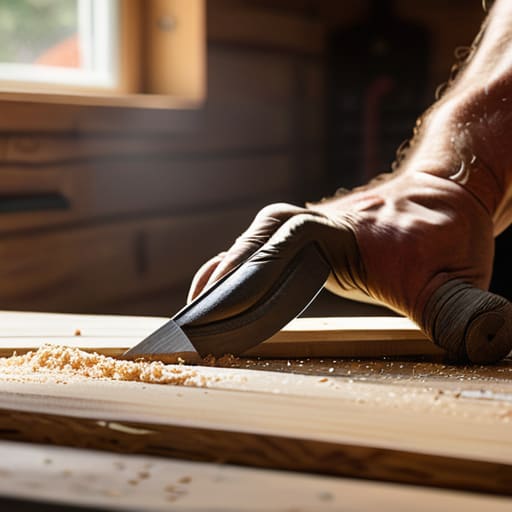
Look, I know the idea of a circular saw or even a hand saw can feel a little intimidating when you’re staring at a fresh piece of lumber. But here’s the thing: most of the stress comes from overthinking the math. When you’re measuring and cutting wood, the golden rule isn’t about being a perfectionist; it’s about accountability. Always mark your line with a sharp pencil, and for the love of all things functional, remember to account for the “kerf”—that’s the tiny bit of wood the blade actually turns into sawdust. If you don’t factor that in, your pieces are going to end up a fraction of an inch too short, and suddenly your sturdy shelving unit design is leaning like the Tower of Pisa.
If you’re just starting out with woodworking tools for beginners, don’t feel like you need a professional workshop to get decent results. A decent speed square and a steady hand go much further than a thousand-dollar kit. My biggest tip? Measure twice, cut once, and then measure a third time just to make sure your brain didn’t glitch while you were busy thinking about what’s for dinner. It’s much easier to trim a millimeter off a board than it is to try and glue a piece back on because you rushed the process. Keep it steady, keep it simple, and just focus on the accuracy of the line.
Essential Woodworking Tools for Beginners Who Value Function
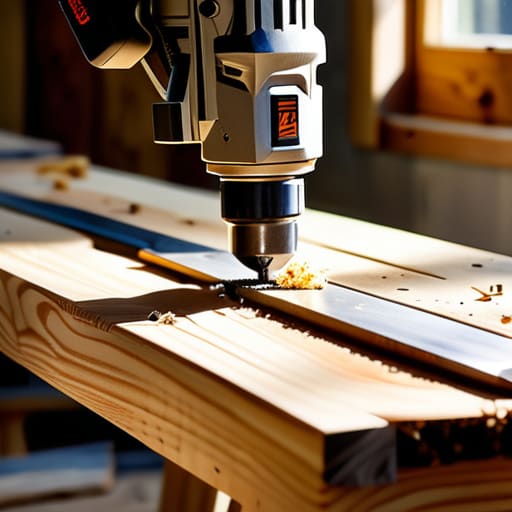
Look, you don’t need a garage full of expensive, shiny machinery to get this done. I’ve seen people get paralyzed by “gear acquisition syndrome,” thinking they can’t start until they own a $500 table saw. Honestly? That’s just a way to procrastinate. For a solid project like this, focus on the basics: a reliable cordless drill, a speed square, and a decent circular saw if you’re working with larger boards. If you’re working on a tighter budget, even a simple hand saw and a mallet will get you through the initial stages of measuring and cutting wood. The goal isn’t to own the best tools; it’s to own the right tools for the job at hand.
Once you move past the structural phase, your focus shifts to making the thing actually look intentional. You’ll want some high-grit sandpaper and a basic orbital sander if you want to save your wrists some serious ache. When it comes to finishing wood surfaces, don’t feel pressured to go for a high-gloss professional look right away. A simple matte wax or a basic sealant is often enough to protect the wood while keeping that raw, authentic feel. Just remember: function over flash every single time. If the wood is smooth and the joints are tight, you’ve already won.
Pro-Tips to Keep Your Project from Becoming a Total Disaster
- Don’t obsess over the “perfect” wood. If you’re on a budget, some decent pine from a big-box store works just fine—just sand it well so you don’t get a splinter every time you grab a book.
- Always, always double-check your squareness. If your corners aren’t actually 90 degrees, your bookshelf is going to lean like it’s had one too many drinks, and nothing ruins a vibe like a wobbling shelf.
- Use a pilot hole every single time. I know, it’s an extra step, but if you try to drive a screw straight into the wood without one, you’re basically asking for a split that’ll ruin the whole piece.
- Overestimate the weight. We all think we only own a few paperbacks, but once you actually start loading up those heavy hardcovers, you’ll realize that adding a middle support or a thicker base is a lifesaver.
- Skip the fancy finish if you’re stressed. A simple clear coat or even just a good sanding is enough to make it look intentional and clean without turning your weekend into a high-stakes chemistry experiment.
The Finish Line (And What Comes Next)
At the end of the day, building this bookshelf isn’t about achieving some flawless, showroom-ready masterpiece. It’s about the fact that you grabbed your tools, faced the sawdust, and actually built something functional from scratch. We covered the essentials: getting your measurements right so you aren’t fighting a wobbly frame, choosing tools that actually work instead of just looking pretty, and navigating those first cuts without losing your mind. If your shelves are slightly uneven or there’s a screw head peeking through the wood, guess what? It doesn’t matter. You’ve successfully moved from “I wish I had that” to “I made that,” and that’s a massive win for your home and your brain.
Don’t let the fear of making a mistake keep you from starting your next project. The real magic isn’t in the perfect finish; it’s in the confidence you gain every time you solve a problem with your own two hands. Whether you’re organizing a massive library or just clearing some desk space, you’ve proven that you don’t need a professional crew to create a space that works for you. So, go ahead and load those books up, grab a coffee, and take pride in the grit it took to get here. You’ve got this.
Frequently Asked Questions
My apartment is super small—can I build something that doubles as a room divider or fits into a weird corner?
Absolutely. Honestly, small spaces are where DIY really shines because “off-the-shelf” furniture almost never fits. If you’ve got a weird corner, measure the exact footprint and build a custom corner unit—it’ll feel way more intentional. For a room divider, try building a tall, open-shelving unit. It creates a zone without blocking light or making the room feel claustrophobic. Just keep the design slim so you aren’t sacrificing precious floor space.
I'm terrified of making a mistake and wasting expensive wood; is there a cheaper material I can practice on first?
Look, I totally get it. Staring at a $40 slab of walnut knowing you might ruin it with one bad saw cut is enough to give anyone anxiety. Don’t do that to yourself. Grab some construction-grade pine or even some cheap plywood from the scrap bin. It’s not “aesthetic,” but it’s perfect for making mistakes. Mess up a measurement? No big deal. Practice your cuts there until your hands stop shaking, then move to the good stuff.
Do I really need to sand everything down, or can I just leave it a bit raw for that "industrial" look?
Look, if you’re going for that raw, industrial vibe, you don’t need to spend hours buffing it to a mirror shine. But don’t just leave it “raw” and call it a day—that’s how you end up with splinters and a bookshelf that feels like sandpaper. Do a quick, coarse sand to knock down the rough edges and any nasty burrs, then hit it with a clear matte sealant. It keeps the grit without the danger.
How do I make sure this thing doesn't tip over and crush my cat if I don't have a heavy-duty toolkit?
First off, protecting the cat is priority number one—no bookshelf is worth a feline casualty. If you’re working with a basic kit, skip the heavy-duty anchors and just grab some simple L-brackets from the hardware store. Screw them into the top of the shelf and directly into a wall stud. It’s not the “prettiest” solution, but it’s incredibly effective and keeps your little chaos agent safe from any accidental tip-overs.