I was staring at a blank, beige wall in my first studio apartment, surrounded by half-unpacked boxes and a mounting sense of dread, when I realized I had two choices: spend three weeks’ rent on “curated” prints or actually learn how to make wall art that didn’t look like a middle school art project. I remember sitting on my floor with a cheap set of acrylics and a literal piece of scrap wood, feeling completely intimidated by the polished, minimalist masterpieces flooding my social feeds. But here’s the truth: those perfectly staged living rooms are total illusions. You don’t need a degree in fine arts or a massive budget to stop living in a space that feels like a temporary waiting room.
In this guide, I’m stripping away the gatekeeping and the expensive “aesthetic” fluff to show you how to build a collection that actually reflects who you are. We’re going to focus on high-function, low-stress methods that prioritize systems over perfection, from repurposing old tech components to mastering basic textures. I’ll show you how to select materials that actually last and how to hang them without destroying your drywall. Let’s get your space feeling functional and actually lived-in.
Guide Overview
Tools & Supplies
- Paintbrush (various sizes for application)
- Palette knife (for texture effects)
- Pencil (for sketching designs)
- Canvas (1 piece, medium size)
- Acrylic paint (1 set, assorted colors)
- Gesso (1 jar, for priming)
- Masking tape (1 roll, for geometric edges)
Step-by-Step Instructions
- 1. First, stop scrolling through Pinterest and audit your space. Grab a measuring tape (don’t use your hands, you’ll mess it up) and figure out the actual dimensions of the wall you’re working with. I always say, don’t try to fill a massive void with a tiny piece of paper; it just looks cluttered and sad. You want something that scales to the room, not something that looks like an afterthought.
- 2. Next, choose your medium based on what you actually have lying around. If you’re into tech, maybe it’s some old circuit boards or high-quality blueprints; if you’re more tactile, go for textiles or even pressed plants. The goal isn’t to buy a $200 kit from a boutique shop, but to use functional materials that already exist in your orbit.
- 3. Now, let’s talk about the “canvas.” If you aren’t painting, you’re likely assembling. I’m a big fan of the modular approach here. Instead of one giant, intimidating piece, think about grouping smaller, cohesive elements. It’s much easier to iterate on three small frames than it is to fix one massive mistake on a large canvas.
- 4. Once you have your components, it’s time to test the layout before you commit any hardware to the wall. I literally use blue painter’s tape to mark out the edges of where everything will go. It’s a total lifesaver because it lets you see the visual weight of the arrangement without putting a single hole in your drywall.
- 5. When you’re happy with the tape outlines, grab your tools—and yes, I mean actual tools, not just your fingernails. If you’re hanging something even slightly heavy, use a level. I know, it feels a little extra, but there is nothing more frustrating than living with a crooked frame for six months because you were too lazy to check.
- 6. Finally, secure your pieces and step back. Don’t get caught in a loop of micro-adjusting every millimeter. If it looks balanced and it’s structurally sound, call it a win. Your home should be a place where you live, not a museum where you’re constantly stressed about a two-degree tilt.
Budget Friendly Home Decor Projects for Real Life
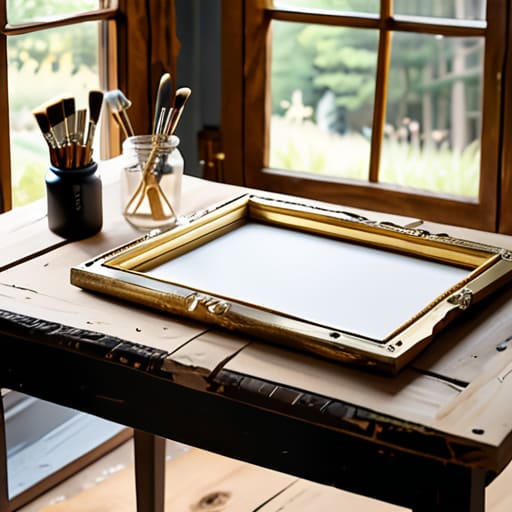
Look, I get it. You want your space to feel “curated,” but your bank account is currently screaming at you to stay away from the high-end boutique galleries. That is exactly where most people get stuck, thinking they need a massive budget to fix a blank wall. Honestly? Some of my favorite pieces come from budget friendly home decor projects that cost less than my weekly coffee run. Instead of hunting for expensive canvases, go to a thrift store and grab whatever weird, oversized frames they have. Even if the art inside is hideous, you can strip it down and use it as a base for your own projects.
If you’re feeling a bit stuck on the creative side, I highly recommend leaning into minimalist wall hanging ideas using scraps you already have. I’ve spent way too many late nights using leftover twine, some driftwood I found on a walk, and even some old fabric scraps to create something that actually looks intentional. You don’t need a studio full of professional equipment; you just need a few basic mixed media art supplies and the willingness to experiment. The goal isn’t to create a museum masterpiece—it’s to make a space that feels like yours without breaking the bank.
Simple Abstract Canvas Painting Methods Without the Mess
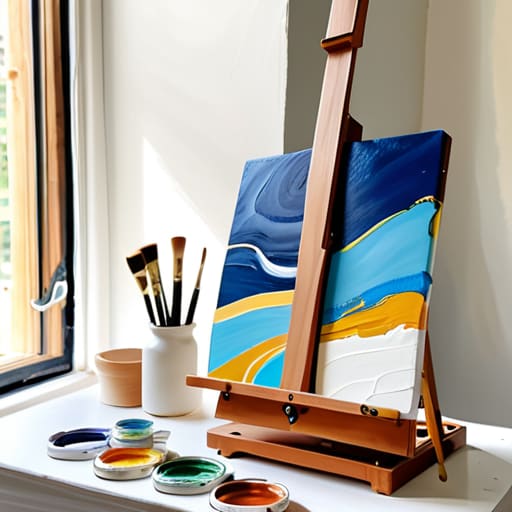
If you’re anything like me, the idea of getting acrylic paint all over your rug sounds like a nightmare. I love a good DIY, but I don’t love spending three hours scrubbing stains out of the floorboards. When it comes to abstract canvas painting methods, the secret to keeping your space clean is all about containment. Instead of working directly on a massive canvas on the floor, try using a tabletop easel or even just a sturdy tray. This keeps your workspace contained and makes it much easier to manage your palette.
To really level up the look without the chaos, I’m a huge fan of using texture over complexity. You don’t need to be a master painter to make something that looks intentional. Grab some modeling paste or even a bit of joint compound from the hardware store to create ridges and valleys on the canvas before you even touch a brush. These kinds of textured wall art tutorials are life-savers because they focus on movement and shape rather than precise, messy brushstrokes. It’s a much more forgiving way to create something that looks high-end and minimalist, rather than looking like a toddler had a field day with a paint set.
5 Pro-Tips to Keep Your DIY Projects from Turning Into a Mess
- Don’t overthink the “art” part. If you’re staring at a blank canvas feeling like you aren’t a “real artist,” just grab some textures or even old tech parts from a junk drawer and glue them down. Function over form, always.
- Test your layout on the floor first. I’ve seen so many people drill twenty holes in a wall only to realize the pieces look awkward together. Lay everything out on the rug, take a photo, and then commit to the mounting.
- Invest in a decent level, not just a “vibes” approach. There is nothing more frustrating than a piece of art that looks like it’s slowly sliding off the wall because you eyeballed the placement.
- Use Command strips instead of heavy-duty nails if you’re renting or just hate the idea of permanent damage. It’s not “cheating”; it’s smart systems management for your living space.
- Keep your color palette tight. If you pick five colors and stick to them across all your pieces, your room will look curated and intentional rather than like a random collection of stuff you found at a garage sale.
Stop Overthinking Your Walls
At the end of the day, making your own wall art isn’t about achieving some curated, Pinterest-perfect masterpiece that looks like it belongs in a museum. It’s about the process of taking something raw—whether it’s a cheap canvas, some leftover acrylics, or even just a collection of vintage prints—and making it yours. We’ve covered how to keep things mess-free, how to work within a tight budget, and how to use abstract methods to bypass that paralyzing “artist’s block.” Just remember: the goal is to create a space that feels like you, not a showroom. If the lines are crooked or the colors are a bit too loud, that’s fine. What matters is that you built something functional that actually brings a sense of personality to your room.
If you’re still sitting there staring at a blank wall feeling like you aren’t “creative enough,” please stop. Creativity is just another system you can learn, and like any system, it works better when you just start running the code. Don’t let the fear of making something “ugly” keep you from making something real. Grab your tools, clear off a small corner of your desk, and just see what happens. Your home deserves to be filled with things that have a story, even if that story is just you finally deciding to take up some space.
Frequently Asked Questions
What should I do if I want to hang my art but I'm renting and can't put holes in the walls?
Look, I’ve been there—staring at a blank wall because your lease says “no holes allowed.” Don’t let that stop you. Grab some Command Strips; they’re the gold standard for a reason, just make sure you actually follow the removal instructions so you don’t peel the paint off. If your art is heavy, try leaning large frames against the wall on a sideboard or using tension rods. It’s not “perfectly centered,” but it’s functional and damage-free.
How do I figure out what size piece actually looks good on my wall without it looking tiny and lost?
Honestly, the biggest mistake I see is people buying something that looks huge in the store but ends up looking like a postage stamp once it’s on a massive living room wall. Here’s my hack: grab some painter’s tape and some old newspapers. Tape out the dimensions of the piece you’re considering directly on the wall. It lets you see the scale in real-time without committing to a single nail. If it looks lonely, go bigger or add a second piece.
I’m not exactly "artistic"—is there a way to make something that looks intentional rather than just a mess?
Look, I get it. I’m more comfortable with a soldering iron than a paintbrush. The secret to making “non-artistic” stuff look intentional is all in the constraints. Don’t just scribble; pick a strict color palette—like three shades of navy and cream—and stick to it. Use masking tape to create sharp, geometric lines. When you limit your tools and your colors, the “mess” starts looking like a deliberate design choice.
What’s the best way to organize my supplies so I’m not constantly hunting for a specific brush or tool mid-project?
Honestly, stop trying to find the “perfect” acrylic organizer on Pinterest. It’s a trap. I swear by clear, modular bins—think hardware store style. Group your stuff by function: one bin for brushes, one for palettes, one for your messy “utility” tools. If you can’t see it, you’ll forget it exists. Keep your most-used items in a rolling cart or a reachable tray so you aren’t breaking your flow mid-project. Systems > Aesthetics.