I spent my childhood watching my dad take apart broken toasters and old radios just to see how they worked, so I grew up with a deep-seated hatred for the “toss it and buy a new one” culture. We’ve all seen those hyper-curated Pinterest boards where every piece of upcycled decor looks like it belongs in a high-end boutique, but let’s be real: most of that stuff is just expensive-looking clutter that doesn’t actually serve a purpose. If you’re tired of feeling like you need a massive budget just to have a home that doesn’t feel like a showroom, you need to start looking at your old, beat-up pieces as raw materials rather than junk. Finding practical upcycling furniture ideas isn’t about chasing a specific “vibe”; it’s about reclaiming the utility of what you already own.
In this post, I’m stripping away the fluff and giving you eight realistic ways to breathe life back into your space. I’ve curated these upcycling furniture ideas to focus on functionality and durability first, ensuring your projects actually survive daily life. Whether you’re working with a wobbly thrift store find or a dresser that’s seen better decades, these steps will help you build a home that works as hard as you do.
Swap the Hardware, Save the Soul
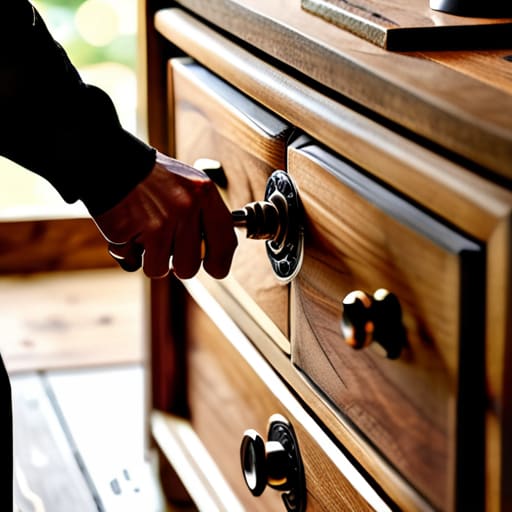
You don’t need to sand down an entire dresser just because the handles look like something from a 1990s office cubicle. Most of the time, a piece of furniture feels “dated” simply because of the tiny metal bits attached to it. Grab a screwdriver, unscrew those crusty old knobs, and go hunting at a local thrift store or even a hardware shop for something with a bit more personality.
The Sanding and Staining Reset
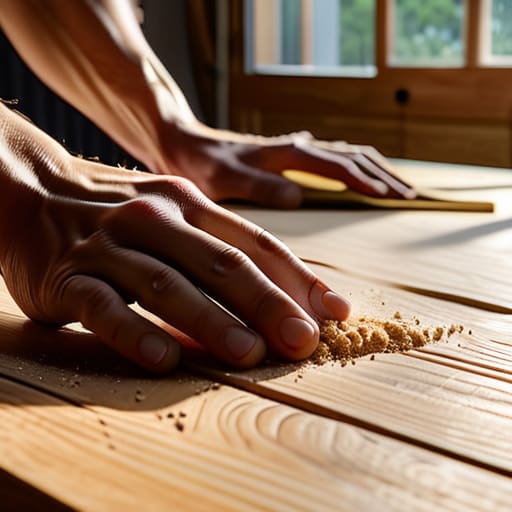
If you’ve inherited a chunky oak table that looks like it belongs in a haunted mansion, don’t panic. You don’t have to paint it a solid, heavy color just to hide the grain. Instead, strip back the old, yellowed varnish and go for a light sand to get it smooth. Once you’ve cleared away the grime, a fresh coat of clear matte sealer or a very light stain can make that wood look incredible without feeling heavy.
Give Old Chairs a Structural Glow-up
Most people toss wooden chairs the second they start to wobble, but that’s usually just a matter of a loose joint or a stripped screw. Before you even think about aesthetic changes, grab some wood glue and a clamp to stabilize the frame. A chair that looks pretty but feels like it’s going to collapse under you is just a decorative liability, and we’re aiming for functionality here.
The Chalk Paint Shortcut
I know, I know—chalk paint gets a lot of hype, but there’s a reason people love it. It’s basically the “cheat code” of the furniture world because it adheres to almost anything with minimal prep. If you have a metal side table or a piece of laminate furniture that’s looking sad, a few coats of chalk paint can give it that velvety, matte finish without requiring you to spend hours stripping layers of old lacquer.
Transform Shelving with Contact Paper
If you have a basic bookshelf that’s looking a bit “college dorm,” you don’t need to replace it. A quick way to add some dimension is by using high-quality contact paper on the back panels of the shelves. It’s a low-stakes way to introduce a pattern—like a subtle geometric print or a faux marble—without committing to a permanent, expensive change.
Reclaim the Legs
Sometimes the body of a piece is fine, but the legs are just… wrong. I’ve seen so many mid-century modern pieces that were basically destined for the landfill simply because they had these clunky, tapered wooden legs that didn’t fit the vibe. You can actually buy replacement furniture legs in various heights and materials, from industrial steel to tapered scandi-style wood.
Lighting as a Design Hack
This one is a bit outside the box, but adding a dedicated light source to an upcycled piece changes how you perceive it entirely. If you’ve refurbished an old nightstand or a small cabinet, consider installing a battery-operated LED strip or a small puck light inside a glass-fronted section. It turns a simple storage unit into a functional focal point.
Use Stencils for Controlled Character
If you want to add a pattern but you’re terrified of a “DIY fail,” stenciling is your best friend. It’s much more controlled than freehand painting and allows you to add a bit of sophisticated detail to a plain surface without needing to be a professional artist. I usually stick to something subtle—maybe a small motif in a corner or a geometric border.
Stop Waiting for Perfection
Look, we’ve covered a lot of ground here—from swapping out hardware to give an old dresser a facelift, to the sheer utility of adding custom shelving to a beat-up bookshelf. Whether you’re sanding down a tabletop or just replacing some crusty, outdated handles, the goal is the same: you’re taking something that was headed for a landfill and making it actually useful for your specific space. You don’t need a professional workshop or a massive budget to make these changes work; you just need the right tools and a little bit of patience to see the potential in the junk. At the end of the day, upcycling isn’t about creating a museum piece; it’s about building systems that work for your life.
If you’re feeling intimidated by the idea of picking up a sander or a drill, just remember that every DIY expert started with a piece of furniture they almost ruined. The “aesthetic” version of your home is a lie told by influencers; the real version is the one you build with your own hands, one small project at a time. Don’t worry about whether your paint job is perfectly smooth or if your measurements are off by a millimeter. Just get in there, get your hands a little dirty, and focus on making things last. Your home should be a reflection of your capability, not just your Pinterest board.
Frequently Asked Questions
I don't have a garage or a workshop, can I actually do this in a small apartment?
Honestly, I used to think the same thing. I spent years thinking you needed a dedicated garage and a massive workbench to be “real” at DIY. You don’t. I do most of my work on a kitchen table with a heavy-duty drop cloth and a rolling tool caddy that fits under my bed. As long as you have a decent multi-tool, some sandpaper, and a way to contain the dust, your apartment is plenty.
How do I know if a piece of furniture is actually worth the effort, or if I'm just wasting my weekend?
Look, I’ve been there—staring at a particle-board disaster at 11 PM, wondering why I didn’t just go to IKEA. Here’s my rule of thumb: check the bones. If it’s solid wood or metal, it’s worth the sweat. If it’s MDF or cheap veneer that’s already peeling, run. Don’t waste your weekend fighting materials that were never meant to be repaired. If the structure is sound, the rest is just a fun weekend project.
What are the absolute bare-minimum tools I need to buy so I don't end up spending a fortune on stuff I'll never use again?
Look, I’ve seen so many people get “tool anxiety” and buy a massive, overpriced kit they’ll never touch again. Don’t do that. Honestly? Start with a decent cordless drill, a multi-bit screwdriver, a hammer, a tape measure, and a level. If you’re doing furniture, grab some sandpaper and a set of clamps. That’s your foundation. Buy quality over quantity; it’s better to have one tool that actually works than ten that strip your screws.
How do I make sure my DIY paint job doesn't end up looking like a messy middle school art project?
Honestly, the “middle school art project” look usually comes down to rushing the prep. If you don’t sand that surface and wipe away every speck of dust, your paint is going to peel or look bumpy. Also, please—stop trying to cover everything in one thick, gloopy coat. It’s better to do three thin, intentional layers than one heavy one that drips. Grab a high-quality brush, take your time, and trust the process.