
I spent three hours last weekend trying to solder a tiny capacitor onto a vintage synth, only to have the whole thing slide across a wobbly, kitchen-table makeshift setup. It was infuriating. Most people think that learning how to build a workbench requires a massive workshop, a mountain of expensive hardwoods, and a level of woodworking precision that borders on the obsessive. But honestly? That’s just gatekeeping. You don’t need a Pinterest-perfect studio or a $500 slab of walnut to create a stable, reliable surface that actually holds your gear and your projects without shaking every time you pick up a screwdriver.
In this guide, I’m stripping away the fluff and the “aesthetic” nonsense to show you exactly how to build a workbench that is built to last. We’re going to focus on structural integrity, smart tool placement, and using materials that won’t break the bank. I’ll walk you through the essential assembly steps so you can stop fighting your furniture and start actually getting things done. Let’s get your space functioning the way it should.
Guide Overview
Tools & Supplies
- Circular saw or miter saw for cutting lumber
- Power drill for driving screws
- Tape measure for accurate marking
- Speed square for ensuring straight lines
- Level to ensure a flat work surface
- 4×4 lumber (legs) 2 pieces
- 2×4 lumber (frame and bracing) 6 pieces
- 3/4 inch plywood (worktop) 1 sheet
- 2.5 inch wood screws 1 box
- Wood glue 1 bottle
Step-by-Step Instructions
- 1. First things first, we need to grab some materials, and no, you don’t need to go on a massive shopping spree at a boutique hardware store. Head to your local big-box retailer and grab some 2×4 lumber (get the straightest pieces you can find, seriously) and a sheet of 3/4-inch plywood for the top. I usually opt for sanded plywood because it makes cleaning up sawdust a lot easier, but honestly, any sturdy sheet will do as long as it isn’t warped.
- 2. Once you’ve got your wood, it’s time to break it down. You’ll want to cut your 2x4s into lengths for the legs and the frame. If you don’t own a miter saw, don’t panic—most hardware stores will make a few cuts for you for a small fee, or you can just borrow one from a neighbor. The goal is to create a sturdy rectangular frame that will serve as the skeleton of your bench.
- 3. Now, let’s get to the assembly. Lay your frame pieces out on a flat surface and start screwing them together using 3-inch wood screws. I highly recommend pre-drilling pilot holes first; trust me on this, it prevents the wood from splitting and makes the whole process way less frustrating when you’re trying to keep everything square.
- 4. Next, we’re attaching the legs. Position your cut legs into the corners of your frame and secure them with more screws. If you want this thing to feel like a tank, use some wood glue in the joints before you drive the screws in. It adds a little extra stability that makes a massive difference when you’re actually working on a project.
- 5. Time for the tabletop. Lay your plywood sheet over the top of your frame. Make sure it’s centered and flush with the edges so you don’t have any weird overhangs that catch your sleeve. Secure it by driving screws through the top into the frame below. Just a pro-tip: countersink your screws so the heads sit slightly below the surface of the wood; this prevents them from scratching whatever you’re working on later.
- 6. Finally, give it a quick once-over. If there are any rough edges or splinters, grab some medium-grit sandpaper and smooth them out. You don’t need to go full “professional finish” here, but a little bit of sanding makes the bench much more user-friendly. Once that’s done, you’re officially ready to start actually using your new workspace.
Ditch the Fluff Heavy Duty Workbench Design That Lasts
Look, I see these Pinterest-perfect woodworking workbench plans all the time, and honestly? Most of them are just expensive ways to make a pretty photo. If you’re actually planning on sawing, sanding, or mounting a heavy vise, you don’t need a delicate piece of furniture; you need a tank. When you’re thinking about heavy duty workbench design, prioritize mass over aesthetics. A bench that wobbles every time you hammer a nail is going to drive you insane. I always suggest using thick, dimensional lumber—think 4x4s for legs—because weight is your best friend when it comes to stability.
Another thing people overlook is how much space your tools actually take up. Don’t wait until you’re halfway through a project to realize you have nowhere to put your drill. Instead of cluttering your workspace, start thinking about workbench tool storage ideas during the build phase. Whether it’s adding a simple pegboard to the back or building out some shallow drawers right into the frame, having your gear within arm’s reach changes everything. You want a system that supports your workflow, not one that forces you to stop every five minutes to hunt for a screwdriver. Keep it simple, keep it heavy, and keep it functional.
Smart Garage Workshop Organization and Essential Tool Storage Ideas
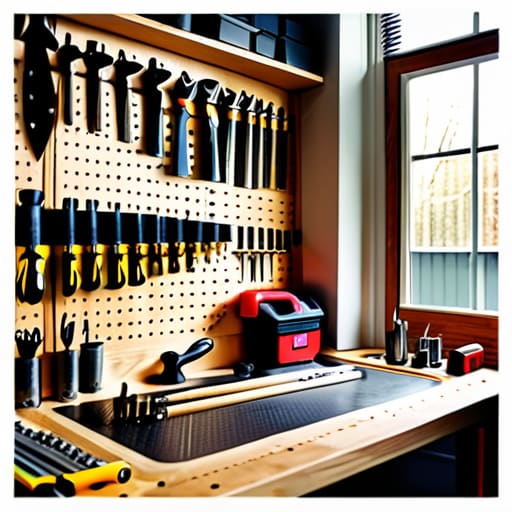
Once your heavy-duty bench is standing, don’t let it become a graveyard for half-finished projects and random scraps. The biggest mistake I see is people spending weeks on their woodworking workbench plans only to lose their momentum because they can’t find a single screwdriver. You need a system that works with your workflow, not against it. I’m a huge advocate for verticality; if you aren’t using your wall space, you’re wasting prime real estate. Think pegboards or even just some heavy-duty magnetic strips for your most-used bits. It keeps your actual work surface clear so you can actually focus on the task at hand instead of playing Tetris with your hardware.
When it comes to garage workshop organization, aim for “active” vs. “passive” storage. Keep your essential woodworking tools for beginners—like your tape measure, square, and most-used pliers—within arm’s reach of the bench. Everything else? Tuck it away in bins or drawers. I’ve learned the hard way that if I have to dig through a toolbox for five minutes every time I need a specific hex key, I’m going to end up frustrated and unproductive. The goal is to make your workbench tool storage ideas feel intuitive. If you can’t grab it in three seconds, it’s in the wrong place.
Five Ways to Keep Your Workspace from Becoming a Total Mess
- Stop obsessing over the “perfect” wood. I don’t care if it’s reclaimed scraps or standard construction lumber; what matters is that it’s heavy enough that the whole thing doesn’t slide across the floor when you’re trying to saw something.
- Build in some “tech real estate.” Since I’m always running diagnostic tools or charging my phone, I always mount a power strip directly to the side of my bench. It saves me from playing a game of Tetris with extension cords every time I need a plug.
- Don’t forget about your back. If you’re building this for more than just light hobby work, get the height right from the start. There is nothing worse than realizing your workbench is too low and spending the rest of the afternoon hunched over like a gargoyle.
- Think about your “future self” when planning the surface. If you’re going to be doing heavy-duty DIY or electronics work, leave enough room for a dedicated “clean zone” so you aren’t mixing sawdust with your delicate components.
- Add a sacrificial top. Instead of using your expensive, finished wood as the actual work surface, throw a replaceable piece of MDF or plywood on top. When it gets covered in glue, oil, or scratches, you just swap it out instead of rebuilding the whole damn bench.
Build It, Use It, Move On
At the end of the day, building this workbench isn’t about achieving some Pinterest-perfect workshop aesthetic that looks great in a photo but fails the moment you actually try to sand a piece of wood. We focused on the heavy-duty stuff—the structural integrity, the smart storage, and a layout that actually makes sense for your workflow. You’ve got a solid, sturdy foundation that won’t wobble when you’re working on a delicate synth repair or a heavy-duty DIY project. Remember, the goal was to create a functional ecosystem for your tools, not a museum piece. If it’s stable and it keeps your gear within reach, you’ve already won the game.
Now that the sawdust has settled, don’t let this project just sit there as a trophy. The real magic happens when you actually start using the space you’ve created. Whether you’re troubleshooting a server, soldering a circuit board, or just finally tackling that home repair you’ve been putting off, this workbench is your launchpad. Don’t worry if it gets scratched or stained over time; those marks are just proof that you’re actually doing the work. Stop overthinking the “perfect” setup and just get started. You’ve built the system—now go out there and make something awesome.
Frequently Asked Questions
Do I really need to buy expensive hardwood, or can I just make this work with construction-grade pine from the local hardware store?
Honestly? Save your money. Unless you’re planning on doing high-end fine woodworking where every millimeter of grain matters, skip the expensive hardwood. Construction-grade pine is the unsung hero of a functional workspace. It’s cheap, it’s sturdy enough for almost any DIY project, and—here’s the best part—it’s replaceable. If you gouge it or spill something, who cares? You can just sand it down or swap a board without feeling like you trashed a fortune.
What’s the best way to make sure the tabletop stays flat over time and doesn't warp after a few months of heavy use?
Look, nothing kills my vibe faster than a workbench that starts bowing like a banana after a month of use. If you’re using solid wood, you’ve gotta account for movement—wood is basically a living thing that breathes with the humidity. My go-to? Use thick, laminated layers or a heavy-duty MDF core topped with a durable skin. If you’re going all-natural, just make sure you seal all sides (top, bottom, and edges) to lock that moisture out.
Should I prioritize a stationary workbench in one spot, or is it worth the extra effort to build something on casters that I can roll around?
Honestly, if you’re tight on space, go with the casters. I’ve spent way too many hours maneuvering around a bulky, stationary bench just to reach a tool on the other side of the garage. Being able to roll your workspace to the project—or tuck it away when you need to park the car—is a total game-changer. Just make sure you invest in high-quality, locking industrial casters; cheap ones will wobble like crazy.
How much space do I actually need to leave around the bench so I'm not constantly bumping into walls while I'm working?
Look, I’ve spent way too many nights stubbing my toes on a workbench because I thought I was being “space-efficient.” Don’t do that to yourself. You need at least 3 feet of clearance on all sides to actually move. If you’re planning on using a rolling stool or a shop vac, aim for 4 feet. It feels like a lot of wasted floor space until you’re mid-project and realize you can actually turn around without a fight.














