
I was standing in my backyard last summer, staring at a pile of expensive, untreated pine boards and a half-empty bag of soil, wondering why I felt so overwhelmed by something that was supposed to be relaxing. I’d spent three hours scrolling through “aesthetic” gardening blogs, only to realize they were all teaching me how to build a backyard showroom rather than an actual garden. If you’re currently stuck in that same loop of decision paralysis, let me save you the headache: learning how to build a raised garden bed doesn’t require a degree in landscape architecture or a massive budget for designer cedar. You just need a plan that actually works with your space and some materials that won’t rot into nothing by next season.
In this guide, I’m stripping away all the unnecessary fluff and gatekeeping. I’m going to walk you through the exact, no-nonsense process of choosing the right wood, securing your frame, and getting your soil ready for planting without wasting a single cent on useless gadgets. We’re focusing on building something sturdy, functional, and—most importantly—actually sustainable so you can stop worrying about the construction and start enjoying the harvest.
Guide Overview
Tools & Supplies
- Drill/Driver for assembling boards
- Measuring tape for accurate cuts
- Level to ensure flat base
- Saw if lumber is not pre-cut
- Untreated cedar or pine boards (4-6 pieces)
- Wood screws (1 box of exterior grade)
- Garden soil/compost mix (enough to fill volume)
- Hardware cloth or landscape fabric (for base)
Step-by-Step Instructions
- 1. First, grab your materials. You don’t need a degree in architecture, but you do need to be smart about what you buy. I highly recommend using untreated cedar or redwood because they naturally resist rot without you having to soak them in weird, toxic chemicals. Avoid that cheap, pressure-treated stuff from the big-box stores if you’re planning on growing anything you actually intend to eat.
- 2. Measure and cut your boards. If you’re feeling lazy (or just don’t own a miter saw), most hardware stores will actually cut the wood to your specific dimensions for a few extra bucks. I usually aim for a width of about three or four feet; anything wider and you’ll be struggling to reach the middle, which is a recipe for a sore back and a messy garden.
- 3. Lay out your footprint and level the ground. This is the part everyone tries to skip, but trust me, it’s the most important step. If your bed is sitting on a slope, water is going to pool in one corner and drown your tomatoes while the other side stays bone-dry. Use a shovel to scrape away any high spots until the base is as flat as possible.
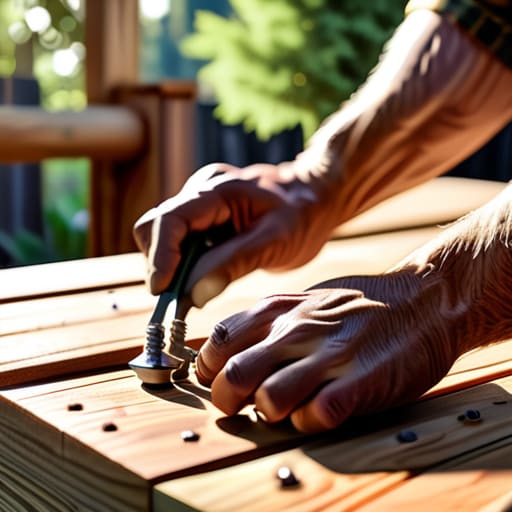
- 4. Assemble the frame using exterior-grade screws. Don’t even think about using regular indoor screws; they’ll rust and snap within a single season. I like to pre-drill my holes to prevent the wood from splitting, especially near the ends. If you want extra stability, you can screw a corner post (a simple 4×4 piece of wood) into the inside of each corner to give the boards something solid to bite into.
- 5. Line the bottom (but not really). If you’re building this directly on grass, you don’t want it immediately turning into a jungle again. I usually lay down a thick layer of corrugated cardboard at the very bottom. It smothers the weeds and grass, but eventually, it decomposes and lets the worms do their thing, which is basically free soil aeration.
- 6. Fill it with a high-quality mix. Stop buying those tiny, expensive bags of “potting soil” meant for indoor plants. Instead, go for a bulk blend of compost, topsoil, and maybe a bit of peat moss or coconut coir. You want a mix that’s light and fluffy so your roots can actually breathe, rather than hitting a wall of hard, compacted dirt.
- 7. Set up your irrigation (optional but life-changing). If you’re like me and occasionally forget that plants are living things, grab a simple soaker hose kit. Lay it across the surface of the soil before you plant your seeds, and you can automate the watering process so you aren’t standing there with a heavy watering can every single morning.
Choosing the Best Wood for Raised Beds Without Wasting Money
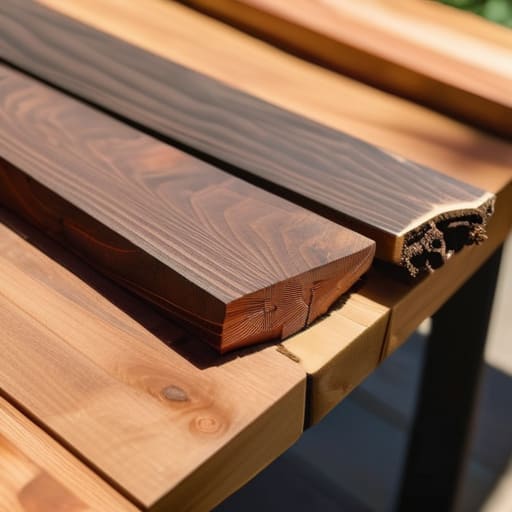
Look, I know the hardware store aisles are designed to make you feel like you need every expensive, specialty board in sight, but you don’t. When you’re weighing the cedar vs pressure treated lumber debate, it really comes down to your budget versus your patience. Cedar is the gold standard because it’s naturally rot-resistant and doesn’t require chemical treatments, but let’s be real: it’s pricey. If you’re on a tight budget, modern pressure-treated wood is actually much safer than it used to be, but if you want to be 100% organic and worry-free, stick to cedar or redwood.
If you’re looking to save even more, check the “cull lumber” bin. Sometimes you can find slightly warped or oddly sized pieces that are perfect for building raised beds for vegetables if you’re willing to do a little extra cutting. Just avoid anything that looks like it’s already starting to crumble or has massive cracks. My rule of thumb? Don’t go for the cheapest pine you can find; it’ll basically turn into mush after two seasons of rain. Invest in something that actually has the structural integrity to survive a few years of damp soil and heavy harvests.
The Right Raised Bed Soil Mix Ratio for Real Results
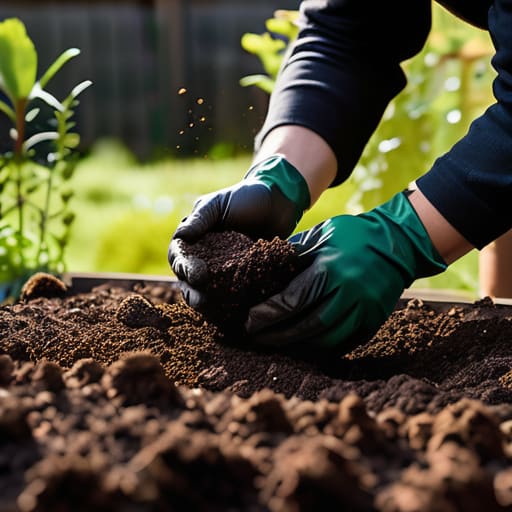
Look, you can spend all your time perfecting the frame, but if you fill it with cheap, heavy topsoil from a bag, you’re basically setting yourself up for a headache. Most people think “dirt is dirt,” but if you’re building raised beds for vegetables, the texture of your soil is everything. You need a mix that stays loose enough for roots to actually move, but holds enough moisture so you aren’t standing there with a hose every twenty minutes.
Instead of buying those overpriced, pre-mixed “premium” bags that are mostly peat moss, I highly recommend sticking to a standard raised bed soil mix ratio of about one-third compost, one-third peat moss (or coconut coir if you want to be eco-friendly), and one-third vermiculite or perlite. This creates a lightweight, nutrient-dense environment that won’t compact into a brick after the first big rain.
If you’re working with deeper beds, don’t feel like you have to fill the entire thing with this expensive stuff. You can use the “Hugelkultur” method—layering old logs, sticks, and dried leaves at the bottom—to take up space and provide long-term organic matter. It’s a total hack for saving money while actually improving your garden’s long-term drainage.
Pro-Tips to Keep You From Regretting Your Build
- Don’t go massive right out of the gate. It’s tempting to build a giant wooden fortress, but unless you have a tractor, you’re going to struggle to reach the middle. Keep your beds no wider than four feet so you can reach everything without stepping into the soil and compacting it.
- Line the bottom with cardboard, not plastic. If you’re building over grass, just layer down some plain, non-glossy cardboard. It smothers the weeds and eventually rots away, turning into actual organic matter for your soil. Plastic just creates a drainage nightmare.
- Level your ground before you even think about screwing boards together. If your bed is sitting on a slant, your water is going to pool in one corner and leave the rest of your plants thirsty. Use a cheap level and a little shovel work to get a flat base first.
- Skip the fancy hardware store screws and get some actual exterior-grade wood screws. The cheap stuff will snap or rust out within a single season, leaving your garden bed looking like a pile of junk. Spend the extra five bucks on screws that are meant to live outside.
- Think about your back before you start digging. If you have the space, build your beds a little higher off the ground. It’s way easier to manage your plants when you aren’t hunched over like a question mark every time you want to weed.
Get Growing and Stop Overthinking
At the end of the day, building a raised bed doesn’t require a degree in landscape architecture or a massive bank account. You’ve already done the heavy lifting by picking the right wood that won’t rot on you in a season and getting that soil mix dialed in for actual nutrient density. Just remember: keep your frame sturdy, don’t skimp on the organic matter, and don’t let the pursuit of perfection stop you from actually putting seeds in the ground. Once the structure is up and the dirt is in, the hard part of the construction is officially behind you.
My biggest piece of advice? Stop scrolling through those hyper-curated garden influencers who make everything look like a staged photoshoot. Your first garden bed might have a slightly crooked corner or a bit of uneven soil, but that doesn’t mean it won’t produce incredible food. The goal isn’t to have a backyard that looks like a magazine cover; it’s to create a functional system that feeds you and gives you a little bit of peace. So, grab your multi-tool, get your hands a little dirty, and just start building. You’ve totally got this.
Frequently Asked Questions
Do I really need to line the bottom with cardboard, or is that just more unnecessary work?
Honestly? It’s not just busywork—it’s actually a huge time-saver. If you just dump soil into a frame, the grass and weeds underneath will fight to climb up into your new bed. Laying down plain, non-glossy cardboard acts as a “kill switch” for those weeds. It smothers them, then eventually breaks down so worms can do their thing. It’s one of those low-effort moves that saves you massive headache later.
How do I stop the wood from rotting out after just one or two seasons?
Look, I get it. There’s nothing more frustrating than spending a weekend building something only for it to turn into mush by next spring. If you aren’t using cedar or redwood, you need a game plan. Line the inside of your beds with heavy-duty landscape fabric or even leftover plastic sheeting—just make sure you poke drainage holes so you aren’t drowning your plants. It creates a barrier between the wet soil and the wood, buying you much more time.
Can I just use the dirt from my backyard, or am I actually going to regret not buying a mix?
Look, I get the temptation to just scoop up whatever’s in the yard and call it a day—it’s free, right? But honestly? You’ll probably regret it by mid-July. Backyard dirt is usually too dense, lacks the nutrients your plants actually need, and can be a playground for pests. If you want to avoid the heartbreak of watching your seedlings struggle, stick to a proper mix. It’s worth the upfront cost to actually see something grow.
What's the best way to keep pests like rabbits or slugs from treating my new garden like an all-you-can-eat buffet?
Look, I’ve spent way too many mornings staring at half-eaten kale leaves, and it’s soul-crushing. For rabbits, don’t bother with those flimsy little plastic fences; get some actual hardware cloth or chicken wire and bury the edge slightly so they can’t dig under. For slugs, I swear by copper tape around the bed edges or even just a shallow moat of beer—it’s gross, but it works. Keep it functional, not fancy.














