I was halfway through a deep-clean of my workstation last Tuesday when I felt it—that familiar, soul-crushing snag of a stray USB-C cable catching my foot and nearly sending my vintage synth flying off the desk. I stared down at the “spaghetti monster” living behind my monitors, a chaotic nest of black wires that looked less like a professional setup and more like a crime scene. We’ve all been told that cable management diy requires expensive, proprietary plastic trays or a complete desk overhaul, but honestly? That’s just gatekeeping. Most of the time, you don’t need a $50 mounting kit; you just need a better way to group your chaos so you aren’t fighting your own equipment every single day.
In this guide, I’m skipping the overpriced aesthetic nonsense and giving you the actual, low-cost methods I use to keep my systems running smoothly. We’re going to talk about using stuff you probably already have in your junk drawer to tackle cable management diy without breaking the bank. I’ll show you how to label your cords so you actually know what you’re unplugging, how to bundle them securely, and how to build a system that actually functions when you need to move your gear. Let’s get your space back.
Guide Overview
Tools & Supplies
- Scissors or Wire Cutters for trimming ties
- Label Maker for identifying cables
- Screwdriver for mounting hardware
- Velcro Cable Ties (1 pack)
- Cable Management Sleeves (1 pack)
- Adhesive Cable Clips (1 pack)
- J-Channel or Cable Raceway (2-3 units)
Step-by-Step Instructions
- 1. First things first, you need to unplug everything. I know, it feels like a massive chore, but you can’t organize a mess if you’re just trying to weave wires through a tangled bird’s nest. Pull every single cord out, lay them on the floor, and actually look at what you’re dealing with. This is your chance to identify those mystery cables that haven’t been plugged into anything since 2019 and finally toss them in the bin.
- 2. Grab some labels—and I don’t mean fancy, expensive ones, just a roll of masking tape and a Sharpie will do. Before you even think about plugging a cord back in, wrap a small piece of tape around both ends of the cable and write what it belongs to (e.g., “Monitor,” “Lamp,” or “Router”). Trust me, when you inevitably have to move your desk six inches to the left in three months, you’ll thank me for not having to trace every single line manually.
- 3. Now, let’s talk grouping. Instead of letting every wire wander off on its own journey, use velcro cable ties to bundle them together. Please, for the love of all things functional, stop using plastic zip ties for everything. Zip ties are permanent and aggressive; if you want to add a new device later, you’ll end up cutting them and potentially nicking a wire. Velcro is reusable, forgiving, and much easier on your sanity.
- 4. Next, we need to manage the “octopus” effect happening behind your power strip. I highly recommend getting a cable management box or even just mounting your power strip to the underside of your desk using heavy-duty command strips. The goal here is to get the bulky, ugly bricks and the massive cluster of plugs off the floor and out of your line of sight. A clean floor makes a room feel twice as big and half as stressful.
- 5. For the wires that have to travel across your desk or down a table leg, use some adhesive cable clips. These little guys act like tiny anchors that keep your charging cables from sliding off the back of the desk every time you unplug your phone. It’s a tiny adjustment, but it stops that constant, infuriating little dance of hunting for your lightning cable under the furniture.
- 6. Finally, do a “stress test” on your new setup. Plug everything back in, turn the power on, and then physically wiggle the cables a bit. You want to make sure nothing is being pulled too tight or bent at an angle that might damage the internal wiring over time. If everything stays put and you don’t see a chaotic tangle of spaghetti peeking out from the sides, you’ve officially built a system that actually functions.
Under Desk Cable Management Solutions That Actually Function
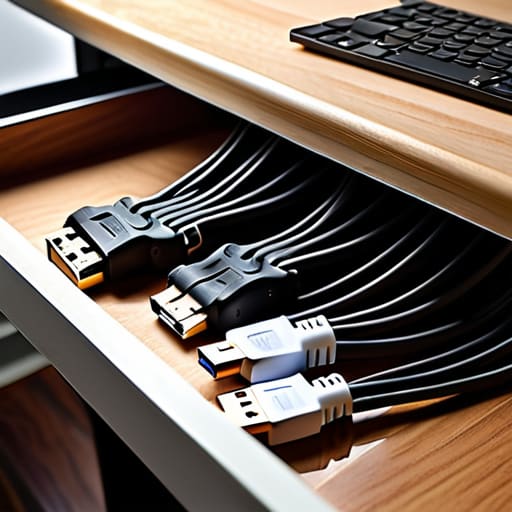
Once you’ve tackled the surface level, the real battleground is underneath your desk. This is where the “spaghetti monster” usually lives, and honestly, it’s the most important part to get right if you actually want to clean your floors without a struggle. Instead of buying those expensive, pre-made plastic trays that often don’t fit your specific desk setup, I’m a huge fan of using velcro straps for wire organization. Unlike those annoying plastic zip ties that require scissors and a prayer to remove, velcro is forgiving. You’re going to add new gear eventually—a new monitor, a better webcam, maybe a MIDI controller—and velcro lets you adjust your setup without a full-blown meltdown.
If you’re on a tight budget, don’t overlook some simple diy cable organizer ideas like mounting a heavy-duty wire basket or even a simple mesh shelf to the underside of your desktop. This keeps your power strips off the floor and tucked away out of sight. When you’re looking at cord management for home office setups, the goal isn’t just to hide the mess; it’s to create a system where you can actually reach a plug when you need to. If you bury everything so deep that you have to crawl under your desk just to reboot your router, you haven’t actually solved the problem—you’ve just hidden the frustration.
Cheap Ways to Organize Electronics Cables Without the Fluff

Look, I get it. You want that clean, floating-monitor look, but you don’t want to drop half a paycheck on high-end aluminum trays and designer sleeves. Most of the “must-have” organizers on social media are just overpriced plastic. If you’re looking for cheap ways to organize electronics cables, my first rule is to raid your junk drawer before hitting “buy” on Amazon.
I’m a huge advocate for using velcro straps for wire organization instead of those single-use plastic zip ties. Zip ties are the enemy of a functional system—once you need to swap out a monitor or add a new peripheral, you’re stuck cutting them off and potentially slicing your cables. Velcro is reusable, infinitely adjustable, and costs next to nothing. If you’re really on a budget, even old bread ties or even strips of fabric from a thrifted shirt can work in a pinch to bundle things together.
Another hack for hiding computer wires at home is simple: use binder clips. If you clip them to the edge of your desk, the metal arms act as perfect little cradles for your charging cables, preventing them from sliding onto the floor every time you unplug your laptop. It’s not “aesthetic” in a minimalist-influencer way, but it’s actually functional, and that’s what matters.
Five Pro-Tips to Keep Your Setup from Turning Into a Spaghetti Monster
- Label everything at both ends. Use a piece of masking tape or a label maker to mark which cord belongs to which device; trust me, you’ll thank yourself in six months when you’re trying to troubleshoot a dead monitor and don’t want to play “guess the wire.”
- Invest in a decent power strip with a long cord. Don’t try to stretch a standard three-foot cord across your room like a tripwire; get one that actually reaches your outlet so you aren’t fighting gravity and tension all day.
- Group by function, not just by look. Instead of trying to hide every single wire, group your “power” cables in one bundle and your “data/peripheral” cables in another—it makes swapping out a keyboard or a mouse way less of a headache.
- Leave some slack. I see people pulling cables so tight they look like guitar strings, but the second you move your desk or adjust your monitor, something is going to snap or pull an outlet out of the wall. Give your tech some breathing room.
- Use Velcro ties, not plastic zip ties. Zip ties are great for permanent installs, but if you’re anything like me and constantly tweaking your setup, you’ll hate the way you have to cut them off every time you want to add a new gadget.
Stop Stressing the Mess
At the end of the day, you don’t need to spend a fortune on those overpriced, designer cable boxes to get your space under control. Whether you’re using cheap velcro ties to group your power strips, mounting a tray under your desk, or just finally grouping those tangled wires so you aren’t tripping over them every time you move your chair, the goal is the same: function over aesthetics. We’ve covered how to manage the heavy-duty stuff under your desk and how to handle the smaller electronics without adding unnecessary clutter to your life. Just remember that the best system is the one that actually stays organized once you stop tinkering with it.
I know it’s easy to feel overwhelmed when you look at a “rat’s nest” of wires and think you need a total room renovation to fix it. But honestly? It’s just a series of small, manageable problems waiting for a simple solution. You don’t need a pristine, minimalist studio to be productive; you just need a setup that doesn’t fight you every time you try to work. Grab your multi-tool, pick one corner of your desk to tackle this weekend, and just start building a space that works for you. You’ve totally got this.
Frequently Asked Questions
How do I keep my cables organized without spending a fortune on those fancy magnetic trays?
Honestly, those magnetic trays are mostly just aesthetic fluff. If you want to save your cash, grab some heavy-duty Velcro ties or even just old bread ties from the kitchen—they work surprisingly well for grouping wires. For a desk setup, I swear by cheap adhesive cable clips or even just running some command hooks along the underside of your desk. It’s not “Pinterest perfect,” but it keeps the chaos contained for pennies.
Is there a way to manage cables if I'm renting and can't drill holes into my desk or walls?
Look, I get it—landlords and “no drilling” rules are the ultimate vibe killer for a clean setup. But you don’t need a power drill to win this battle. Grab some heavy-duty command strips or adhesive cable clips; they hold surprisingly well and pop right off when you move. If you’ve got a heavy desk, weighted cable holders are a lifesaver. Basically, think “stick, don’t pierce.” Your security deposit will thank you.
How do I stop my power strips from becoming a giant, tangled nest under my feet?
First, stop trying to hide them in a tiny box; those things are heat traps and a total pain to access. Instead, grab some heavy-duty Velcro ties—not those plastic zip ties that you have to cut off later—and mount your power strip directly to the underside of your desk using command strips or screws. If you can’t mount it, get a cable management tray. It keeps the “nest” off the floor and out of your way.
What’s the best way to label my cords so I'm not playing "guess the wire" every time I need to unplug something?
Look, don’t bother with those fancy, expensive label makers if you aren’t using them every day. Honestly? I just use masking tape and a Sharpie. It’s not “aesthetic,” but it works, and you can peel it off without leaving a sticky mess when you upgrade your gear. If you want something more permanent, get some colored electrical tape or those little velcro cable wraps. Just tag both ends of the cord so you aren’t playing “guess the wire” mid-troubleshooting.