
I was staring at a pile of expensive, heavy velvet fabric on my floor, feeling like a total failure because I couldn’t get the hem to sit even, when I realized something: I was trying to follow a tutorial designed for a professional seamstress with a studio full of industrial gear. Most people think you need a high-end sewing machine and a degree in textile design to pull off diy curtains, but honestly? That’s just a gatekeeping myth that keeps us from actually finishing our rooms. I learned the hard way that if you obsess over every single millimeter of precision, you’ll never actually get anything hung on your windows.
In this guide, I’m stripping away the fluff and showing you how to make diy curtains that actually look intentional without the mental breakdown. We aren’t aiming for that untouchable, showroom perfection you see on Instagram; we’re aiming for functional, cozy window treatments that make your space feel like home. I’ll walk you through selecting fabric that won’t fight you, the simplest ways to finish an edge, and how to hang them so they look actually decent on the first try.
Guide Overview
Tools & Supplies
- Fabric scissors for clean edges
- Sewing machine for stitching seams
- Measuring tape for accurate dimensions
- Iron and ironing board for crisp hems
- Pins or clips to hold fabric in place
- Fabric (2-3 yards depending on window size)
- Thread (1 spool matching fabric color)
- Curtain tape or header tape (1 roll)
- Measuring tape (1 unit)
Step-by-Step Instructions
- 1. First, grab your fabric and actually measure your window twice. I know, it’s tedious, but there is nothing worse than spending three hours sewing something only to realize it’s two inches too short. You want to measure the width of your rod and then add about 1.5 to 2 times that amount so the curtains have those nice, natural folds. For the length, decide if you want them hovering just above the floor or pooling slightly; just don’t go so long that they become a dust magnet.
- 2. Once you’ve got your measurements, it’s time to cut. Lay your fabric out flat on a clean floor or a large table—avoid the bed if you can, because it’s too squishy and will mess up your lines. Use a piece of tailor’s chalk or even a pencil to mark your cutting lines. Make sure you’re adding an extra inch or two to your final desired size for the hem allowance, because you’re going to need that extra fabric to fold under and sew.
- 3. Now, let’s prep the edges. This is where most people get overwhelmed, but just think of it as “cleaning up” the fabric. Fold the raw edges inward by about half an inch and press them with an iron. I’m a huge believer in the power of a good iron; it makes the sewing part infinitely easier because you aren’t fighting against wrinkled, wonky fabric while trying to guide it through the machine.
- 4. Time to create the rod pocket or the header. If you’re using a standard curtain rod, you’ll want to fold the top of the fabric down to create a sleeve. Decide how wide that sleeve needs to be based on the diameter of your rod—give it a little wiggle room so it doesn’t get stuck. Pin everything in place with sewing pins (or clips if you hate pins) and double-check your alignment before you even touch the sewing machine.
- 5. Start sewing. If you’re using a machine, a straight stitch is your best friend here. Just follow your pressed lines and keep a steady pace. If you’re doing this by hand because you’re a minimalist who doesn’t want to own a bulky sewing machine, use a backstitch to ensure the seams are strong enough to hold the weight of the fabric. You don’t want your hard work sliding off the rod halfway through the night.
- 6. Don’t forget the bottom hem. This is the part people usually rush, but it’s what gives the curtains that finished, heavy look. Fold the bottom edge up to your desired length, iron it flat, and sew a straight line all the way across. If you want a more “expensive” look, do a double fold, but honestly, as long as it’s straight, nobody is going to judge you.
- 7. Finally, give them a quick “stress test.” Hang them up, shake them out, and see how they drape. If one side looks a little wonky, don’t panic; just unpick a few stitches, re-iron the fold, and try again. The goal isn’t a museum-quality masterpiece; it’s about getting functional, decent-looking curtains into your space without breaking the bank.
Smart Fabric Selection for Window Treatments That Actually Last

Look, I know the temptation to just grab whatever cute print is on sale at the craft store, but if you want these to stay looking decent after three months, you have to think about the physics of your windows. If you’re dealing with a sun-drenched living room, a lightweight cotton voile is going to turn into a glorified rag in no time because the UV rays will eat it alive. For high-traffic or high-sun areas, I always suggest looking for heavyweight linens or synthetic blends that can actually hold their shape. When you’re doing your fabric selection for window treatments, prioritize durability over that “perfect” Instagram texture.
Also, don’t let the weight of the fabric intimidate you. If you pick something super heavy, you’re going to need to be way more intentional with your curtain rod hardware installation to make sure you aren’t staring at a pile of fabric on your floor by next Tuesday. A heavy velvet looks incredible, but it’s going to demand some serious anchors in your walls. My rule of thumb? Match the “heft” of your fabric to the strength of your setup. It’s better to spend an extra ten bucks on a sturdier rod now than to rebuild your entire window setup in a month because the weight pulled the screws right out of the drywall.
Measuring Windows for Custom Curtains Without the Stress
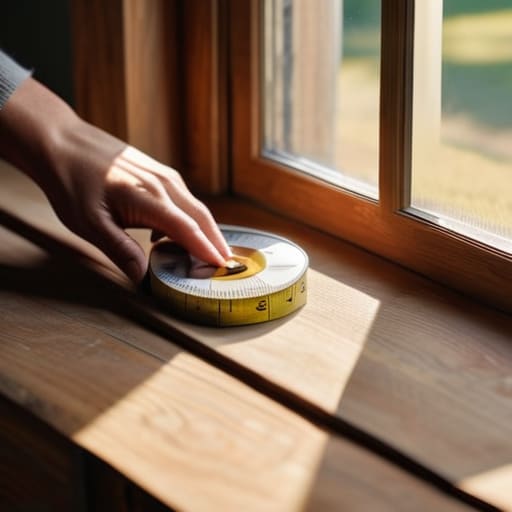
Look, I get it. The thought of pulling out a metal tape measure and doing math while standing on a wobbly chair is enough to make anyone want to just buy some cheap blinds and call it a day. But here’s the secret: measuring windows for custom curtains isn’t about being a mathematician; it’s about accounting for real life. Don’t just measure the glass. If you want that high-end, designer look without the designer price tag, you need to measure the entire window frame and then add a few extra inches on each side. This helps hide the edges of the window and makes the whole setup look intentional rather than like you just slapped some fabric over a hole in the wall.
My biggest tip? Always measure twice, cut once. Seriously. I’ve lost way too many yards of expensive fabric because I was rushing. When you’re determining your width, remember to account for “fullness”—that’s the extra fabric that creates those nice, soft folds instead of looking like a flat sheet. Also, don’t forget to measure from your desired rod height down to the floor. If you’re planning on a specific curtain rod hardware installation, make sure you’re measuring from where the rod will actually sit, not just where the window ends. It’s the small details that keep your space from looking cluttered.
Pro Tips to Keep Your Windows from Looking Like a Craft Project Gone Wrong
- Don’t skip the iron. I know, it’s a chore, but if you hang curtains straight off the bolt, they’re going to look messy and cheap. Steam out those fold lines before they hit the rod so they actually drape like they’re supposed to.
- Go heavy on the hem tape if you aren’t a sewing pro. If the idea of a sewing machine makes you want to close your laptop and walk away, just use iron-on hem tape. It’s a total lifesaver for getting clean, straight edges without the headache.
- Think about light, not just vibes. If you’re putting these in a bedroom, grab some blackout lining. There is nothing worse than finishing a whole DIY project only to realize you’re wide awake at 6 AM because the sun is blasting through your “aesthetic” fabric.
- Use enough fabric to actually get some pleats. If you buy fabric that’s exactly the width of your window, your curtains are going to look like flat sheets of paper. Aim for at least double the width of your window so you get that nice, lush fullness.
- Test your hardware first. Before you commit to the whole setup, make sure your rod can actually handle the weight of the fabric you chose. I’ve seen too many people try to hang heavy velvet on a flimsy tension rod, only to have the whole thing come crashing down in the middle of the night.
Done and Dusted
At the end of the day, making your own curtains isn’t about achieving that untouchable, high-end showroom look you see on your feed. It’s about the fact that you picked a fabric that actually stands up to the sun, you measured your windows with precision, and you didn’t let a little bit of loose thread derail the whole project. You’ve successfully bridged the gap between a bare, cold window and a room that finally feels like it has some soul. Just remember: if the hem is a tiny bit crooked or the stitching isn’t perfectly straight, it’s okay. You focused on the functionality and the fit, and that is what actually makes a house feel like a home.
I know that starting a DIY project can feel a bit intimidating when you’re staring at a pile of raw fabric and a sewing machine, but I promise you, the “I made this” feeling is worth every bit of the effort. Don’t let the fear of making a mistake keep you from upgrading your space. Life is way too short to spend your money on overpriced, mass-produced decor when you have the power to build your own systems. Grab your tools, get messy, and just start. You’ve totally got this.
Frequently Asked Questions
Do I really need a sewing machine for this, or can I get away with just using iron-on hem tape?
Honestly? You can totally skip the sewing machine. If you aren’t looking to build a professional upholstery business, iron-on hem tape is your best friend. It’s faster, cheaper, and way less intimidating if you’re staring at a pile of fabric feeling overwhelmed. Just make sure you follow the heat instructions on the package—if you don’t get a solid bond, those curtains will be dragging on your floor by next week.
How do I figure out how much fabric to actually buy so I don't end up with curtains that look like skimpy little scraps?
The biggest mistake people make is buying exactly enough fabric to cover the window. That’s how you end up with curtains that look like cheap scraps. You need “fullness.” For a natural, high-end look, aim for 2 to 2.5 times the width of your window. If your window is 40 inches wide, you want about 80–100 inches of fabric width. It feels like overkill until you actually hang them and see that gorgeous drape.
What’s the best way to hang these if I’m renting and can't exactly start drilling holes into the walls?
The “no-drill” struggle is so real. If you’re renting, skip the heavy-duty hardware and look into tension rods—they’re perfect for recessed windows and leave zero trace. If you need something more substantial, Command curtain rod hooks are your best friend, just make sure you clean the wall with rubbing alcohol first so they actually stay put. It’s not as “permanent” as drilling, but your security deposit will definitely thank you.
How do I keep my DIY curtains from looking cheap or "homemade" once they're actually up?
The “homemade” look usually comes down to two things: bad hardware and messy edges. Stop using those flimsy, tension-based rods; invest in a solid, weighted curtain rod that actually feels substantial. Also, if you aren’t ready to master a sewing machine, skip the raw edges and use hem tape or even just a clean iron-on adhesive. It keeps the lines crisp. If the fabric hangs straight and the hardware looks intentional, nobody will know it’s DIY.














